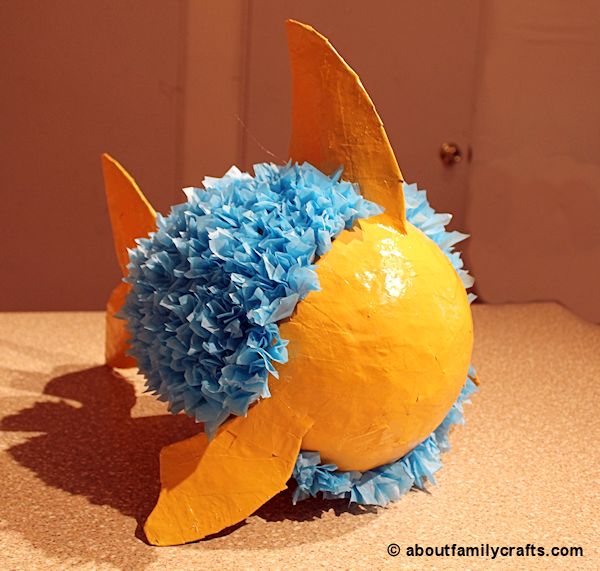
I hope this little fish will swim right into your heart. Fill it with sweet treats and small prizes and it will be a perfect addition to a birthday party no matter what the theme, or any other event. Beware though, it is so adorable you might not want it to be hit around with a club.
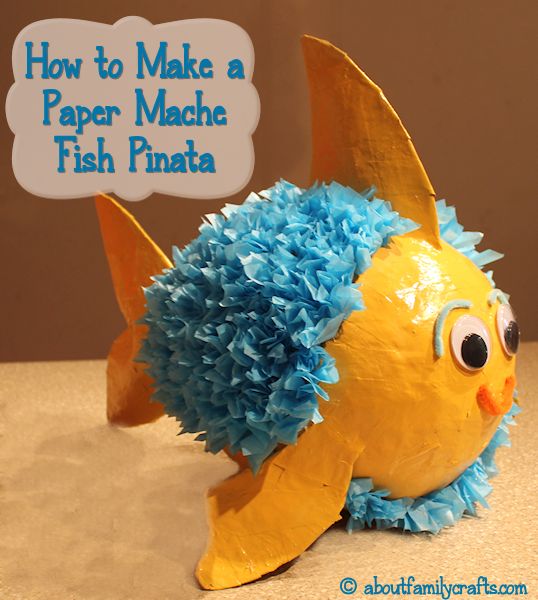
This pinata was actually made because someone requested directions to make a fish-shaped one; however, you can use these same steps to create just about any kind of pinata you like.
Supplies You Need to Paper Mache:
- Printer Paper
- Lightweight Cardboard (cereal boxes, etc.)
- Balloon
- Masking Tape
- Newspaper
- Paper Mache Paste (find recipe link below)
- Spray Paint
- String
- Tissue Paper
- Craft Glue or Hot Glue Sticks
- Large Google Eyes
- Chenille Stem
Tools You Need to Paper Mache:
- Printer or Pen
- Scissors
- Hot Glue Gun (Optional)
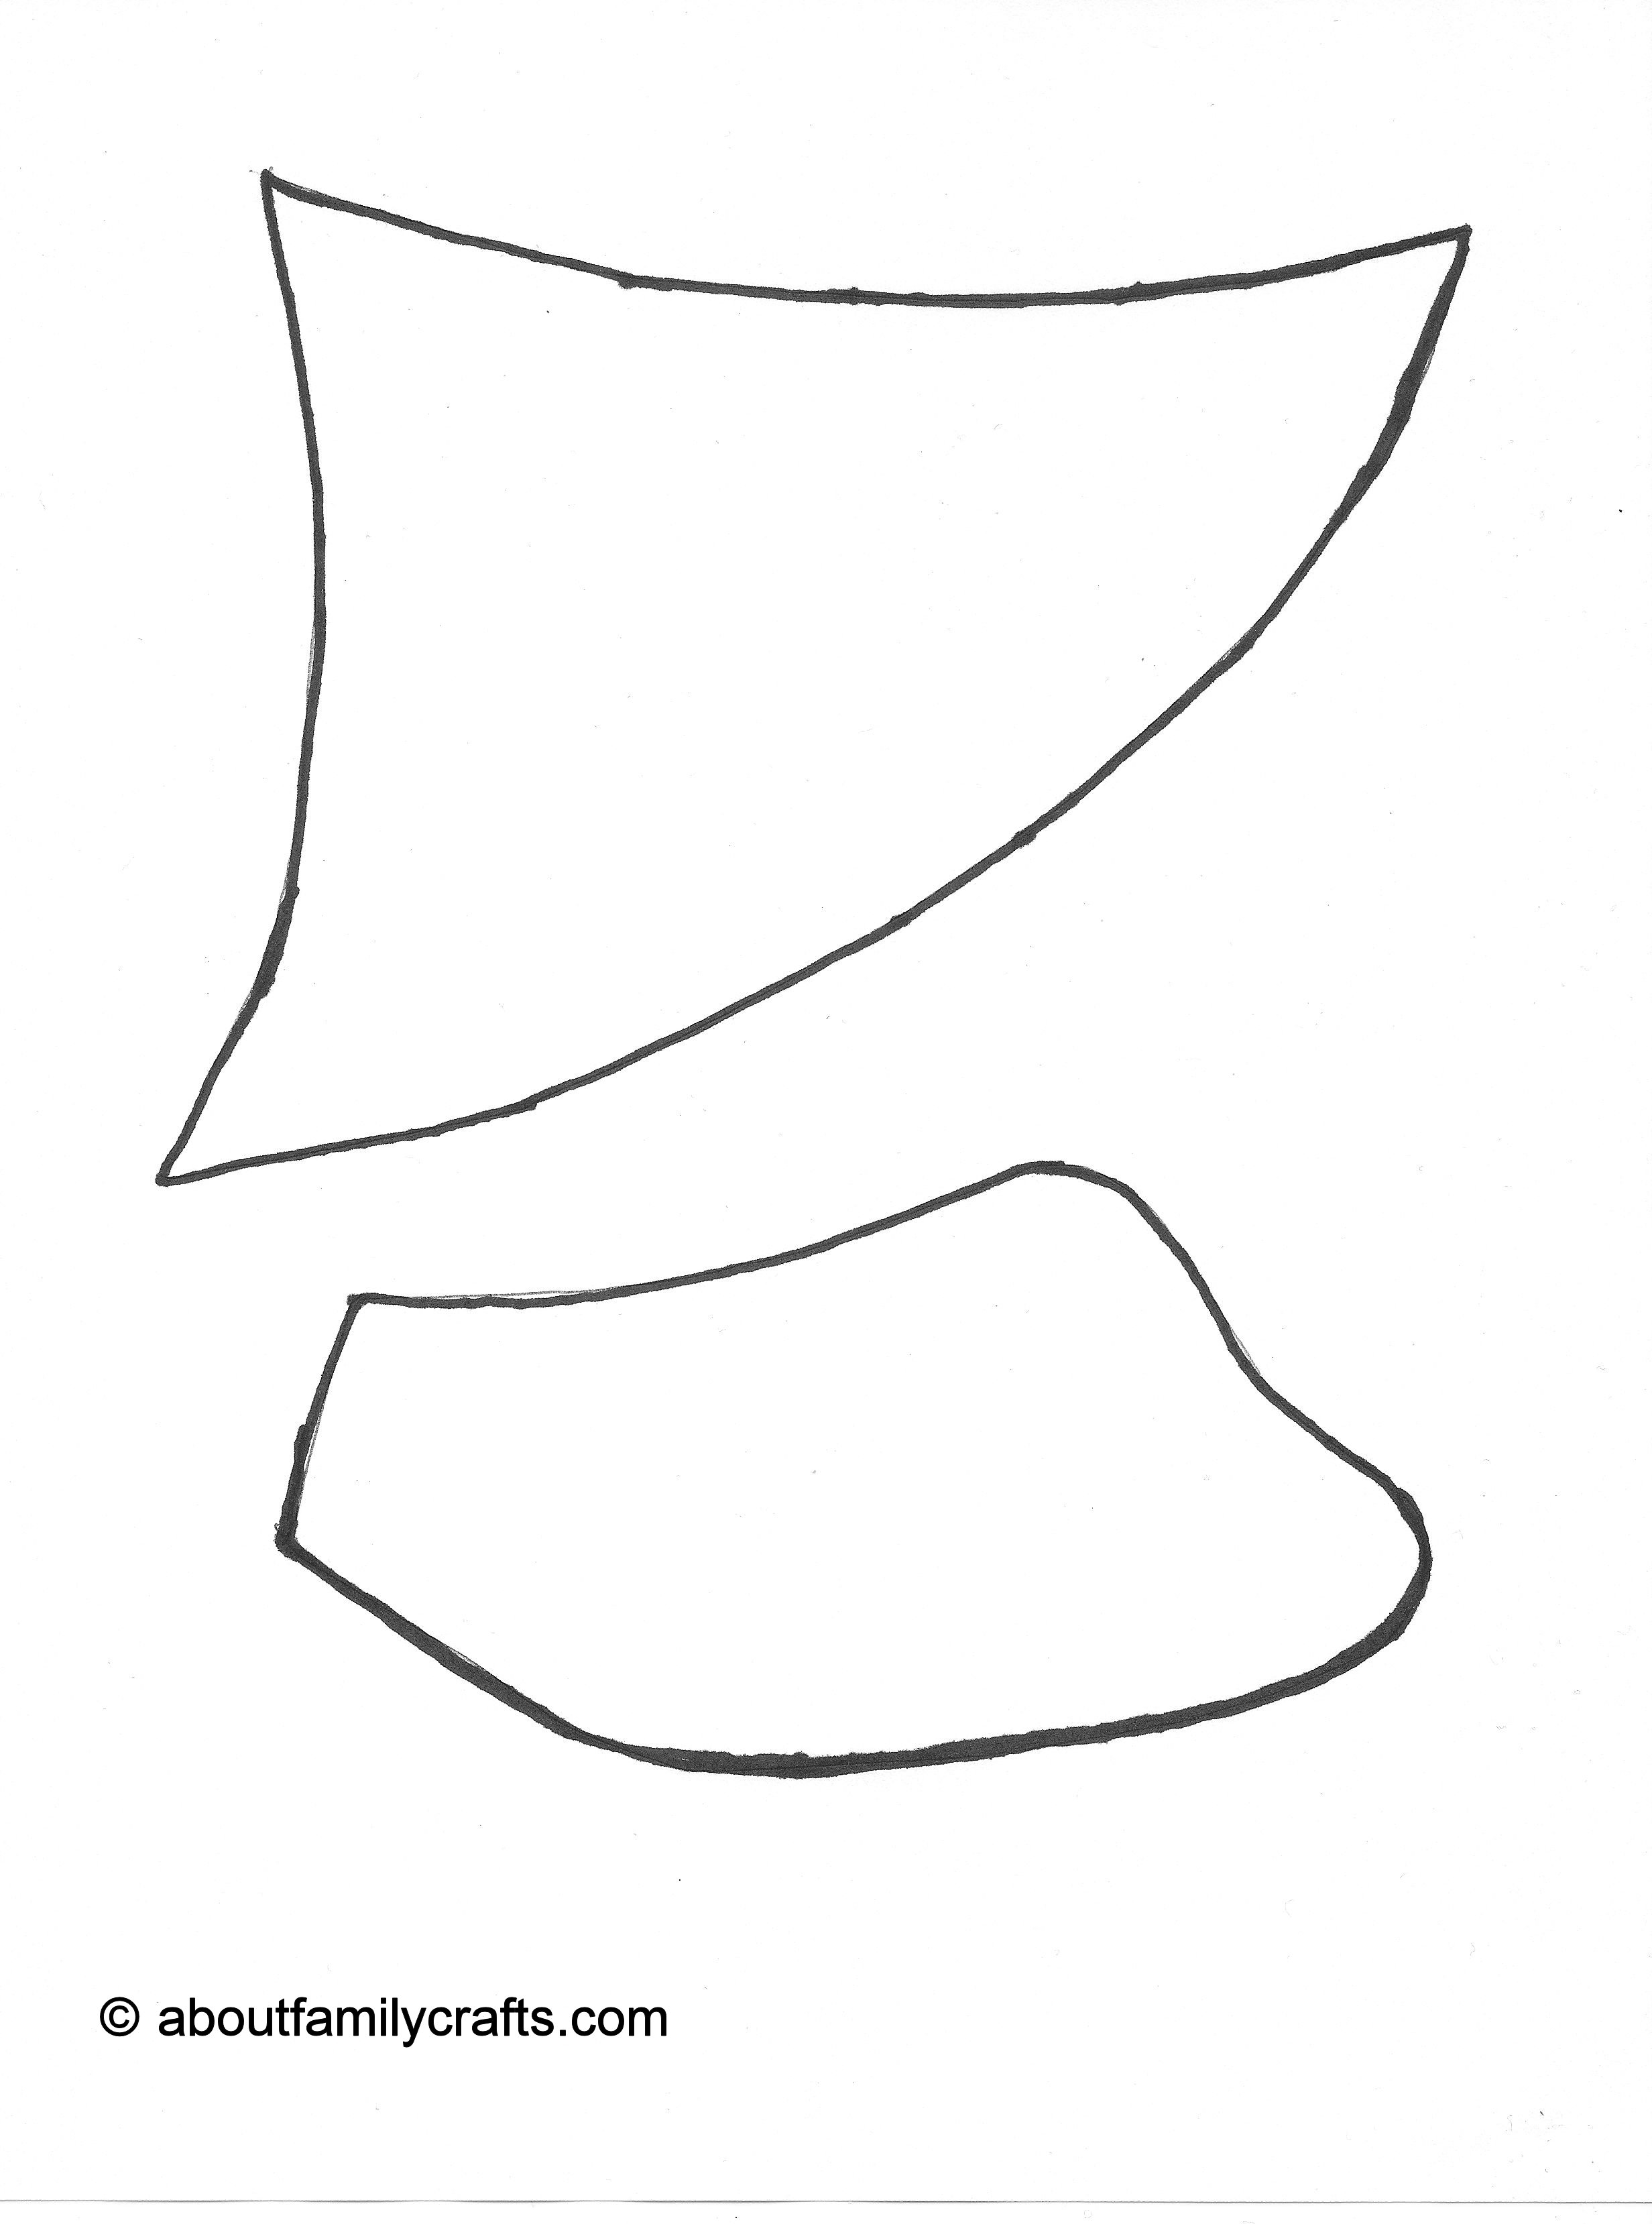
The first thing you need to do is make the fish’s fins. You can draw your own or simply download the ones I drew.
 |
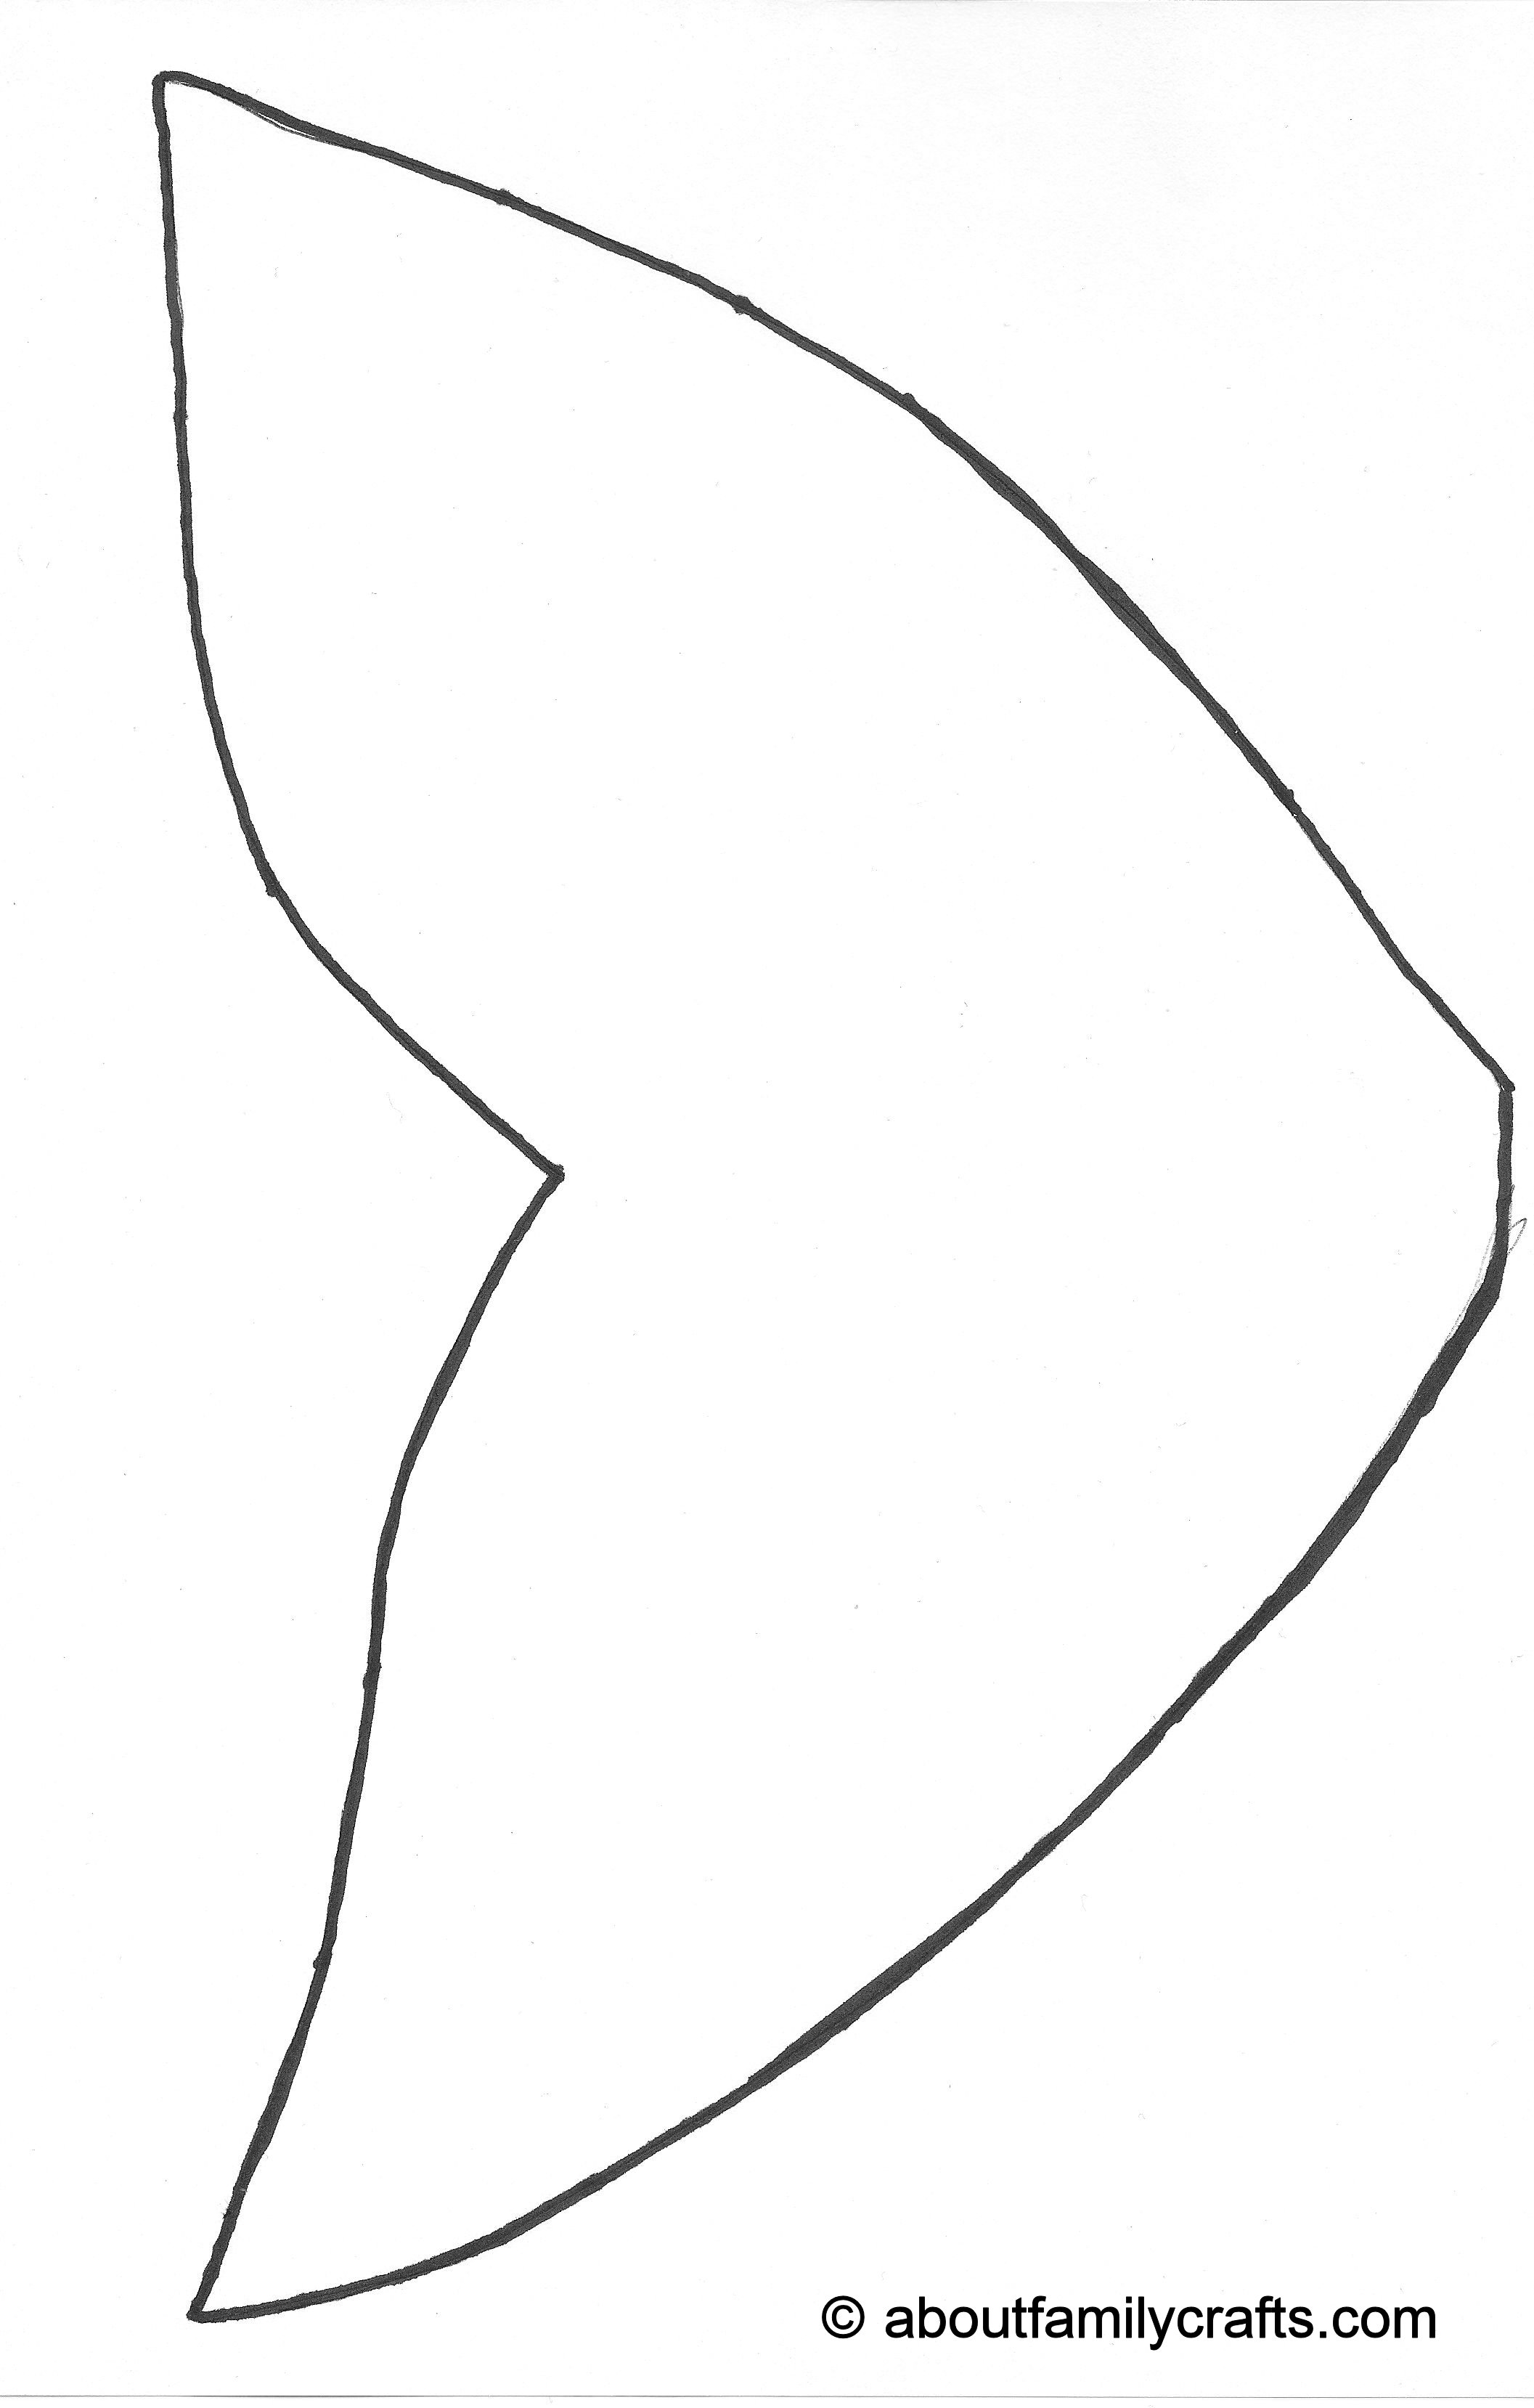 |
Cut out your templates. Trace them onto the cardboard and cut them out. Cut out two of each piece. You will want to make sure the small pectoral fins (the ones on the sides of the fish) are mirror images of each other.
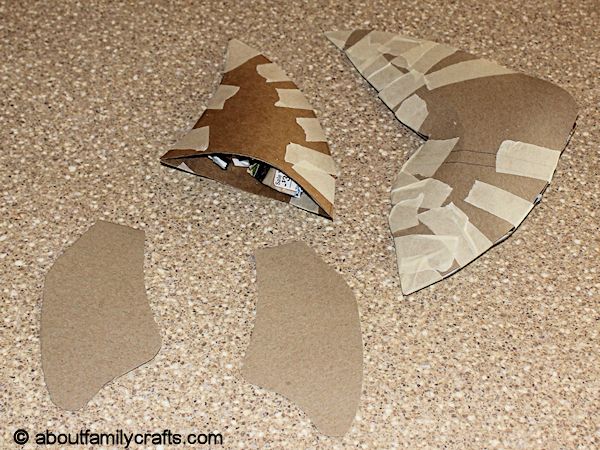
For now, set the pectoral fins aside. Use masking tape to tape the two dorsal fins (the fin on top of the fish’s body) together. Also tape the two tail fins together. Crumple up small balls of newspaper and shove them inside the fins you taped together to give them some dimension.

Blow up a balloon. Use masking tape to attach the fins to the balloon (use the picture for reference). It is easier to work with the fish if you set the balloon on a bowl.
Mix up a batch of paper mache paste (follow this recipe). Tear several pieces of newspaper into strips that are about 1-inch wide and anywhere between 3- to 6-inchees long. They do not have to all be the same size. You want to tear the strips instead of cutting them because the rougher edges actually are smoother.
You will want to cover your work surface before you begin paper maching because it is a very messy craft. I laid a black garbage bag on the table.
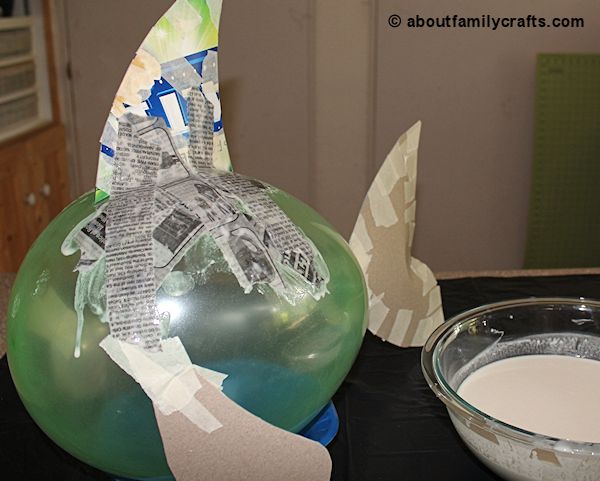
Now you are ready to begin. Dip one of the newspaper strips into the glue. Lift it out and then run the newspaper strip through your fingers so you can squeeze off any extra glue. Set the newspaper strip on the balloon and smooth it down. Dip a second newspaper strip into the glue. Squeeze off the extra and place the strip on the balloon. You will want the strips to go in different directions and even cross over each other.

Continue on in this manner, covering the entire fish. This includes the fins. You will need to let the top of the fish dry and then flip it over and do the bottom. The small bowl I had the fish sitting in wouldn’t work because of the large dorsal fin, so I had to find a large, deeper bowl.
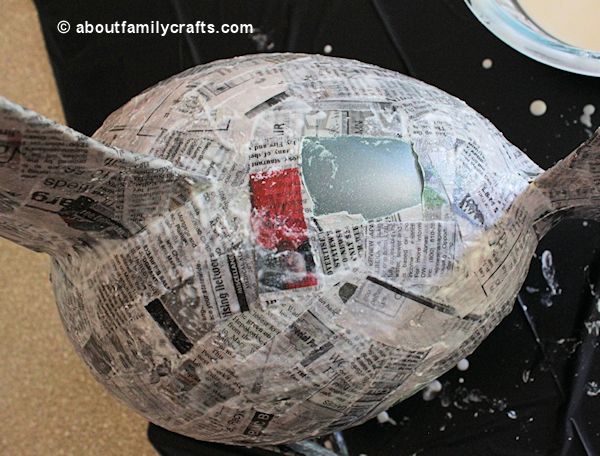
When you are paper maching the top of the piñata, make sure you leave a small opening so you can fill it with treats. If you forget this step, or don’t make the hole big enough, you can always cut one later.

You will want to cover your piñata with 3 to 4 layers of paper mache. Let each layer dry for at least 24 hours before adding the next layer. Once you are done adding layers, and the paper mache is totally dry, pop the balloon.
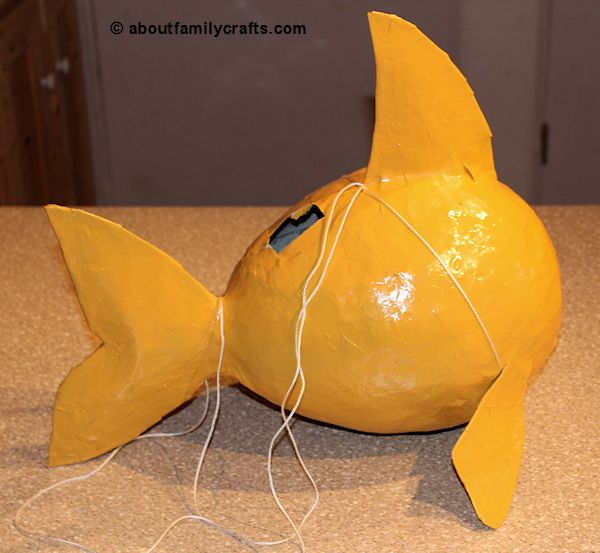
You can now start decorating your paper mache piñata. I used several thin coats of orange spray paint on my fish. Let the paint dry.
Cut a piece of heavy duty string about 10 feet long. Lay it on your work surface. Set the fish on the center of the string. Pull up each end and tie the string together just behind the dorsal fin. You will use this string to hang up the piñata. Don’t worry, it will be covered during the next step!
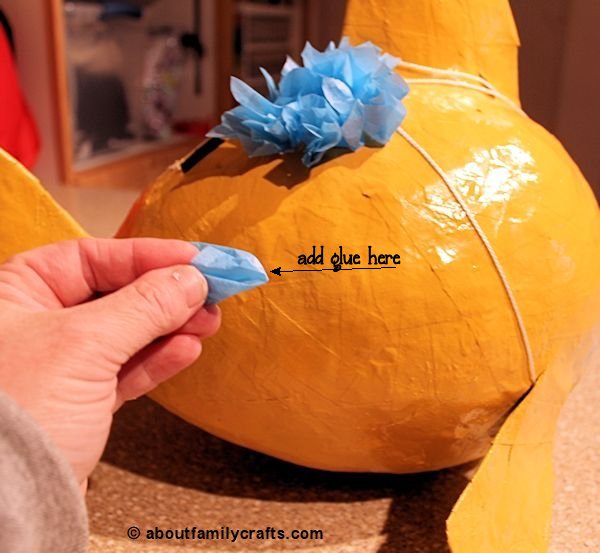
Cut several small squares (about 2-inches) out of tissue paper. Carefully grab a square and hold all four corners together. Put a dab of glue on the center of the square and then press the glue onto the fish. Repeat this step, placing the second tissue paper square right next to the first one. You can use either craft glue or a hot glue gun and glue sticks.
Continue this until you have as much of the fish covered as you want. Make sure you glue tissue paper squares over the string. Let the glue dry before you move the piñata too much so the tissue paper doesn’t fall off.

Now all you need to do is make the fish’s face. I used an orange chenille stem for the mouth and blue chenille stems for eyebrows. I glued on large google eyes and called it done!
What do you think? Will you make a paper mache fish piñata? Will you use these directions to make a different piñata?


7 comments for “Make a Paper Mache Pinata Fish”