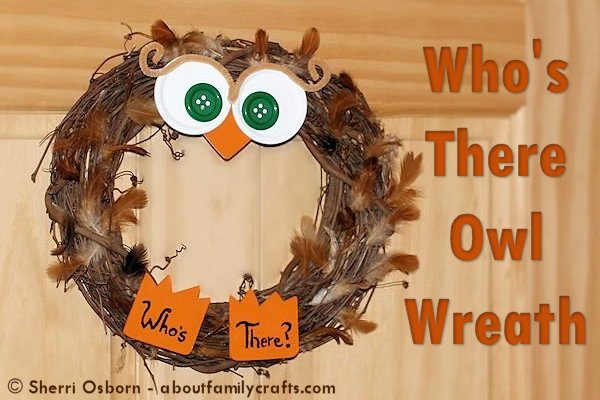
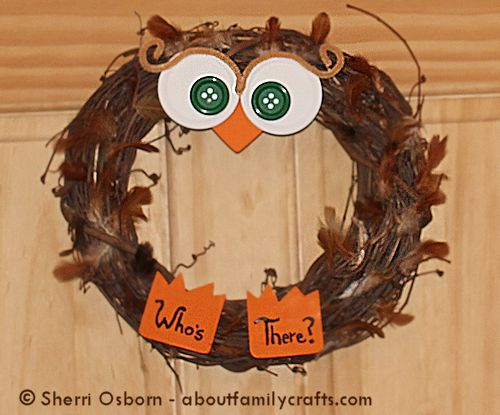
When I first started thinking about what to make out of canning jar lids (for the canning jar lid craft challenge), one of the first things that popped into my mind was an owl. I knew I wanted to use the lids as owl eyes, but I had no clue what else to do for this craft. So, I started out by making the owl’s eyes and then kept building on them until I came up with this owl wreath.
Supplies Needed for the Owl Wreath:
- 2 Canning Jar Lids
- 2 Large Buttons
- 2 1/2” Wood heart
- Chenille Stem
- 6” Wood Sign
- Grapevine Wreath
- Feathers
- Paint
- Craft Glue or Hot Glue
Tools Needed:
- Paint Brush
- Utility Knife
- Sand Paper
- Hot Glue Gun
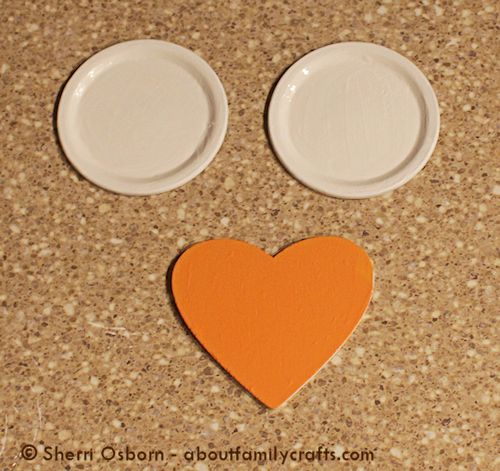
The first thing you need to do it paint the canning jar lids and the wood heart. It may take two or more thin coats of paint to get good coverage. This is especially true if there is writing or a design on the canning jar lid. Let the glue dry between coats so you don’t get bubbling, and also make sure it dries well before you move onto the next step.
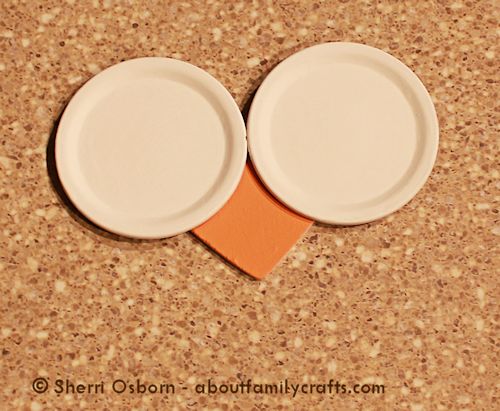
Using craft glue, a hot glue gun, or a combination of both, glue the two canning jar lids onto the bumps on the heart so it looks like two eyes and a beak. I like using both hot glue and craft glue together on projects. The craft glue will usually give you a stronger bond once it dries, and the hot glue dries so fast it will hold all of the pieces together while the craft glue dries.
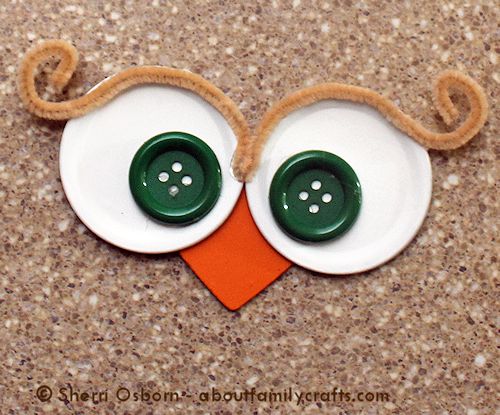
Finish the details of the owls face using two large buttons and a chenille stem. If you prefer, you can simply use paint to finish the eyes. The eyebrow is made by folding a chenille stem in half and using a hot glue gun to stick it around the outer edge of the canning jar lid.
This is as far as I had gotten on my owl craft in my head so it sat on my craft table for a few days while I circled it and contemplated what to do with it. At first I thought maybe a magnet, but I knew it would be pretty big and heavy for that. The general idea for this wreath came to me in the middle of the night and then the owl wreath came together as I experimented in my craft room the following morning.
The first thing I did was glue the eyes to the top of the wreath. To decorate the wreath, I first grabbed Ribbon and didn’t like that look at all. I then tried some jute twine and it still wasn’t quite right. I then pulled out my bin of feathers (yes, I do have a bin of feathers). I started randomly sticking them in here and there and loved the look. Just a little craft glue on the end of each feather held it in place.
It still felt a little plain though. I pulled out the ribbon and jute twine again to experiment with bows to attach to the bottom of the wreath; again, it just didn’t look right to me. Looking at the wreath again, I thought perhaps the owl could use feet. First I grabbed a couple more wooden hearts but they just looked like hearts. I found the wooden sign in my box of wooden pieces and thought it would be perfect.
I had to first cut it in half, I drew a line down the center and used a utility knife to make several slices through it until it cut all the ways through. I used sandpaper to smooth down the cut edge and also to round the corners just a little bit. If you don’t want to hassle with cutting the wood and sanding it down, you could always use craft foam.
Finally, I painted the wooden feet orange. Once that dried, I use black paint to write “Who’s There?” on the feet. What do you think of it?




42 comments for “Who’s There Owl Wreath”