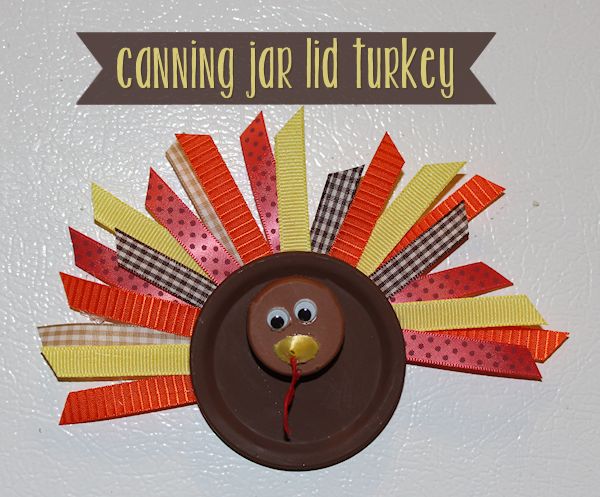
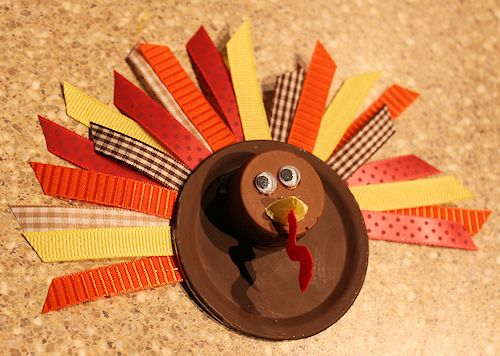
When I went into my craft room to try to come up with some new turkey crafts, I noticed I still have a stack of canning jar lids (left over from this canning jar lid craft challenge). I figured that would be a good item to use to make a turkey craft along with a cap from a water bottle and some ribbon.
I made my canning jar lid turkey into a magnet, but you can use it to decorate in other ways. Attach it to a candle to use as part of a centerpiece or you can dress up old napkin rings or create new ones using them. This would make a fun Thanksgiving decoration along with the canning jar lid pumpkin I made.
Supplies Needed to Make this Turkey Craft:
- Canning Jar Lids
- Screw-on Bottle Cap
- Paint
- Google Eyes
- Ribbon
- Red Rick-Rack
- Magnets
- Craft Glue or Hot Glue Sticks
Tools Needed:
- Paint Brush
- Scissors
- Hot Glue Gun (optional)
The first thing you need to do is make sure your canning jar lid and bottle cap are clean and dry.
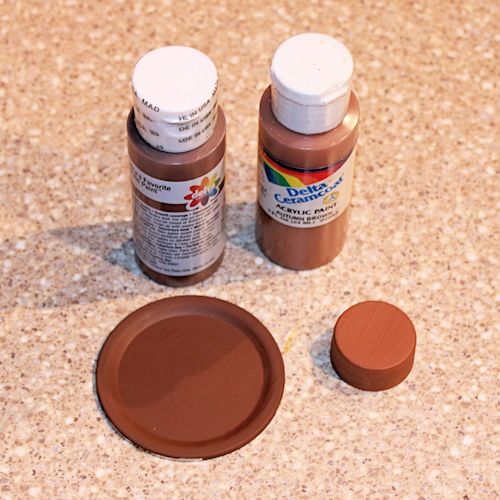
Paint the canning jar lid and the bottle cap. I painted each one a different shade of brown. You can paint yours whatever color you like. It might take a few coats of paint to get complete coverage.
You might want to consider sealing your paint with a clear acrylic sealer. I noticed the paint on the canning jar lid liked to chip a little bit as I worked with it. I simply touched up the paint on these areas once the turkey was complete.
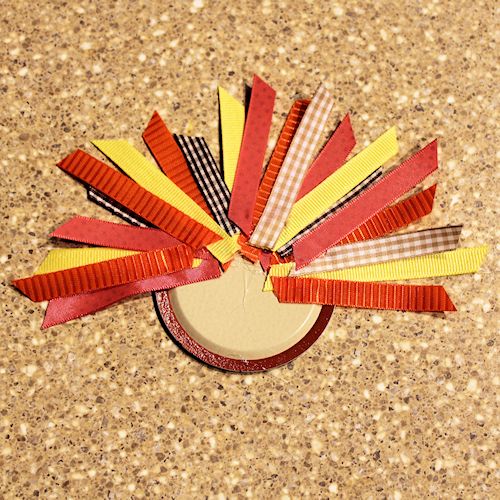
Use a variety of different fall colored ribbon. I used yellow, red, orange, and brown. Cut 5 or 6 pieces from each color that are about 3-inches long.
When the paint (or sealer) is dry, flip your canning jar lid over on your work surface. Use craft glue or the hot glue gun and glue sticks to attach the piece of ribbon to the back of the canning jar lid. Use the picture here as a guide. You want them to extend over the edge of the canning jar lid about 2-inches and to only cover about half of the back of the lid.
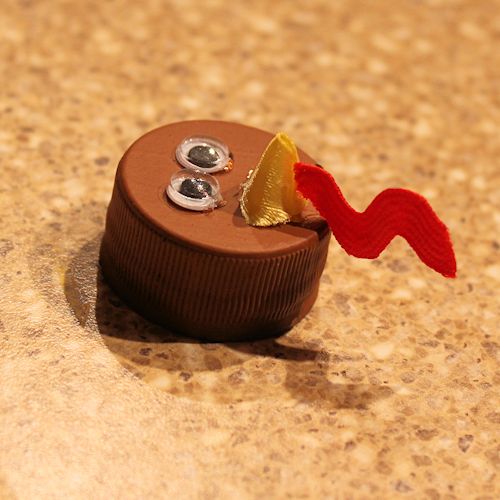
Now we will start working on the turkey face. I used a ribbon to make a beak. If you like, you can simply cut a triangle from yellow craft foam.
To make a ribbon beak, cut a piece of ribbon that is about 5-inches long. Fold the ends over each other so that you get a cone shape in the middle of your ribbon. Use a few dabs of glue so the ribbon stays in this position. Let the glue dry or cool completely.
Trim down the ribbon beak so it looks like a tiny cone-shaped beak. Glue it in place on the bottle cap. Cut a piece of red rick-rack that is about an inch long. Glue it to the underside of the beak. Glue two google eyes above the beak.
It is now time to assemble the turkey. First, if you are making your turkey into a magnet, glue the magnets (I used three small magnets because this turkey might be a little heavy) onto the back of the canning jar lid.
Let the glue on the magnets dry and then flip the canning jar lid over and glue the head onto the turkey’s body. Let the glue dry before you stick your turkey to your fridge. Your canning jar lid turkey craft is now done!
Shared as part of Think Pink Sunday, Sunday Showcase Party, That DIY Party, Nifty Thrifty Sunday, Bouquet of Talent Linky Party, Three Mango Seeds Link Party, Bewitch Me & Titi Link Party, Link It or Lump It Party, Busy Monday, Craftastic Monday Link Party, Clever Chick’s Blog Hop, Motivate Me Monday, Monday Fun Day, The Inspiration Board, Too Cute Tuesday, Titus 2 Tuesday, Project Inspire{d} Link Party, The Gathering Spot.




7 comments for “Canning Jar Lid Turkey Craft”