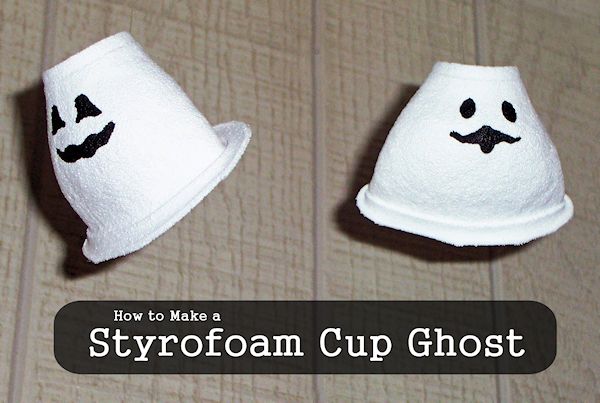
You can make these little Styrofoam cup ghosts and hang them around your home to decorate for a Halloween party or just for the fun of it. Use it as a great excuse to gather the family together and have a Halloween craft night. You probably already have everything you need to make this lying around your house.
Supplies You Need to Make this Styrofoam Cup Ghost:
- 1 White Styrofoam Cup
- Parchment Paper
- 1 Pony Bead, any color
- Monofilament
- Black Paint
Tools Needed:
- Cookie Sheet
- Large Needle
- Scissors
- Paintbrush
Turn oven on to 250 degrees. Line a cookie sheet with parchment paper. Place the styrofoam cups, bottom side up, on the cookie sheet. Make sure they are about 4-inches apart. Place the cookie sheet in the oven.
Watch as the Styrofoam cups slowly melt. It should take about 2 minutes to get the same look as my ghosts. You can definitely experiment with more or less time to get whatever look you want. Remove the cookie sheet from the oven and let the Styrofoam cups cool for a few minutes.
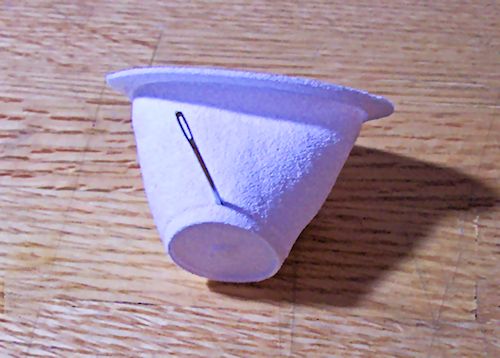
Once your ghosts are cool enough to touch, use a large needle to put a hole in the ghost. Look at all sides and choose the side you want to be the back of the ghost. You want the hole to be on the side of the cup, not the top because when you hang up the ghost you want it to be looking downward.

Cut a piece of monofilament about 2 to 3 feet long. Push it through the hole in the cup. Carefully pull it out of the opening in the cup. Tie a pony bead onto the end of the monofilament in the cup. Lift up the other end of the monofilament and the bead should nest the inside of the cup and hold the monofilament in place.
Paint a face on your ghost and then set it aside to dry. Your Styrofoam cup ghost is now ready to hang. What will you do with it?