
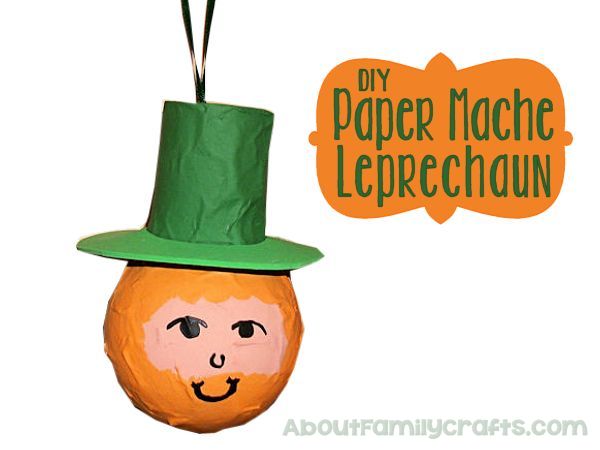
Awhile back, I created a paper mache Cat-in-the-Hat in honor of Dr. Seuss’ birthday; and, while I already had all of the supplies out, I thought I could use the same techniques to create a paper mache leprechaun craft. Do you think he is as cute as the Cat-in-the-Hat?
Hopefully, you have everything on hand to make one of these paper mache leprechauns in time for St. Patrick’s Day. You can even do what I did and make both this leprechaun and the Cat-in-the-Hat at the same time.
Supplies Needed to Make a Paper Mache Leprechaun:
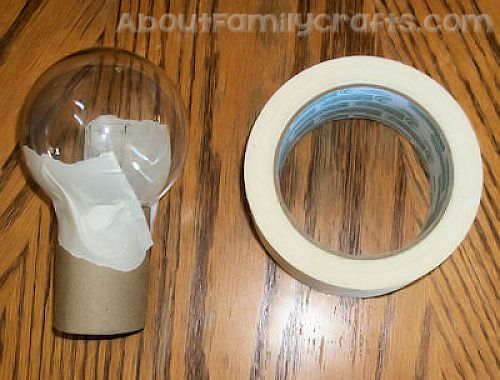
- Toilet Paper Roll
- Burnt Out Light Bulb
- Masking Tape
- Newspaper
- Paper Mache Paste
- Acrylic Paint
- Craft Glue or Hot Glue sticks
- Green Craft Foam
- Ribbon
Tools Needed:
- Scissors
- Pen
- Paint Brush
- Hot Glue Gun
Cut the toilet paper roll in half. Slide it over the cap (metal part) of the light bulb. Use masking tape to hold it in place. Make sure the masking tape is smooth so it will easily be covered by the paper mache.
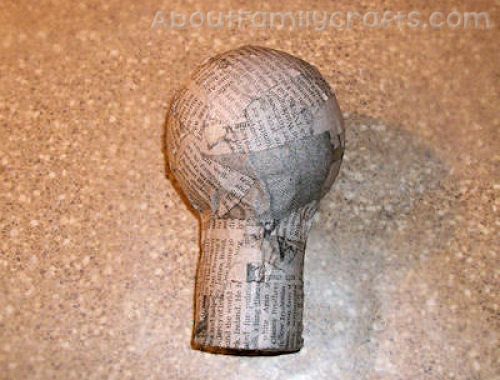
Grab a couple piece of newspaper and tear them into small pieces, about 1-inch thick by 2- or 3-inches long. You want to rip the newspaper instead of tearing them because that helps the edges blend more.
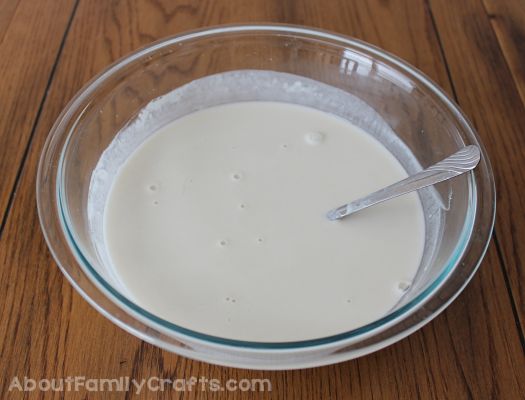
Now, you need to mix up a batch of paper mache paste. The simplest one to use involves mixing together 2 parts of flour with 3 parts water. You may also want to sprinkle in some salt. You can follow along with this tutorial to make your paper mache paste: How to Make Paper Mache Paste.
Get ready to get messy! Using one piece of ripped newspaper at a time, dip it in the paper mache paste, wipe off any extra, and place it on the light bulb. As you continue to add pieces make sure they all overlap somewhat. You will want to cover the entire light bulb and toilet paper roll with newspaper. Once it is covered, set it aside to dry.
I highly recommend you add a couple layers of paper mache. If you do this, make sure the first layer is completely dry before you add another.
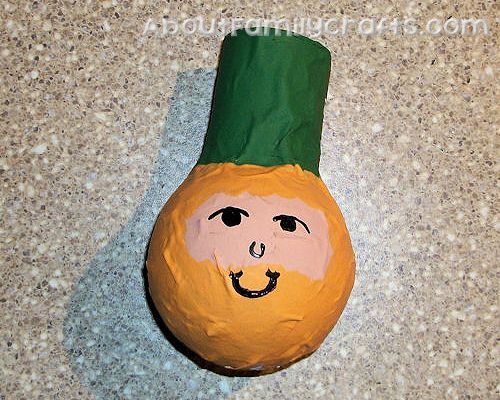
Grab your paint and get to transforming your plain paper mached light bulb into a leprechaun. You will want to paint the toilet paper roll with green paint because it will be the leprechaun’s hat. The light bulb will be the leprechaun’s face so I started out by painting on the flesh colored paint. I then topped it with hair and mustache using orange paint. I painted simple facial features using black paint.
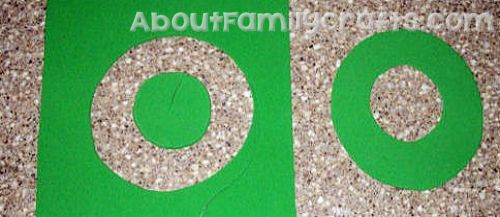
To make the hat brim, trace around the end of the toilet paper roll section of your paper mache leprechaun onto a piece of green craft foam. Cut that circle out. Now, move out about an inch and cut around that circle. The end result should resemble a green donut.
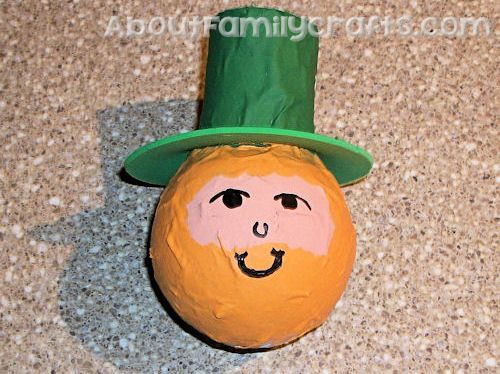
Slide the green, craft foam circle over the leprechaun’s hat. Use a little bit of glue to secure it in place.
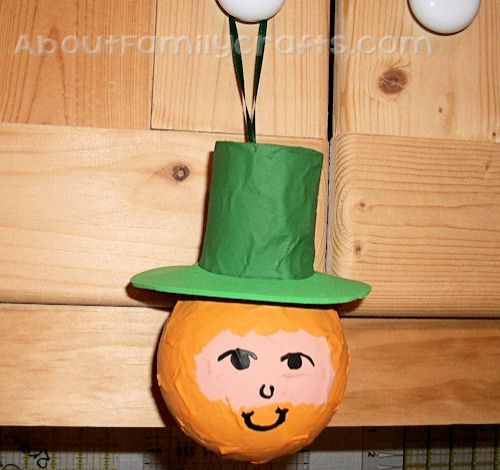
All that is left to add is a ribbon so you can hang your leprechaun up. Cut a piece of ribbon that is about 10-inches long. Fold it into a loop, holding the two ends together. Glue the two ends to the back of the paper mache leprechaun’s hat. Let the glue dry.
Your leprechaun is now all done. What will you do with it?