
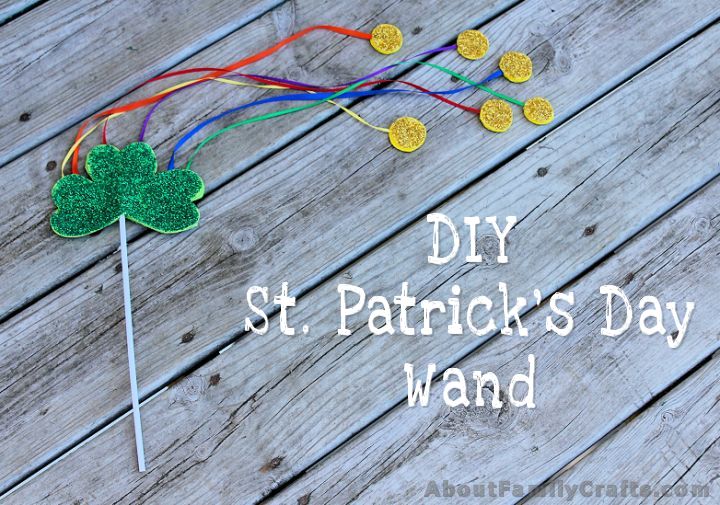
Most kids love the idea of a magical wand, so why not show them how to make their own St. Patrick’s Day wand that incorporates a shamrock, rainbow, and gold coins.
I don’t know about your kids, but my young grandkids love playing with anything that looks like a magic wand. My two year old granddaughter likes to aim it at people and say “I turn you to frog”… I look forward to seeing how much they all like this one with the colorful ribbon and loads of glitter.
Supplies Needed to Make a St. Patrick’s Day Wand:
- Green and Yellow Craft Foam
- Ribbon (6 different colors)
- Mod Podge
- Green and Yellow Glitter
- Thin Dowel or Skewer
- Hot Glue Sticks or Craft Glue
Tools Needed:
- Heart-Shaped Cookie Cutter
- Scissors
- Pen
- Paint Brush
- Hot Glue Gun
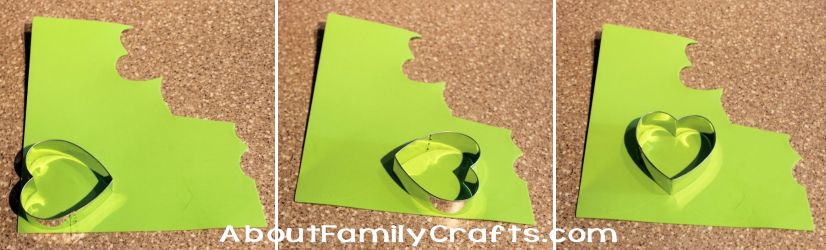
The first thing you need to do is to create your shamrock shape. I will explain how I made mine using a heart-shaped cookie cutter; but, if you prefer, You can download and print out this Shamrock Pattern that I created for another project.
To make a shamrock like I did, lay your green craft foam down in front of you. Starting near two edges, press the cookie cutter into the foam. This will make a groove so you don’t have to trace around it. Next, lay the cookie cutter on the craft foam to make a mirror image of your first heart shape. Line up the points of the heart and press. Finally, place the heart cookie cutter, upright, between the two hearts you have already made. You will once again want to line up the points. Press. (Sorry you can’t see the impressions the cookie cutter made in the photos!)
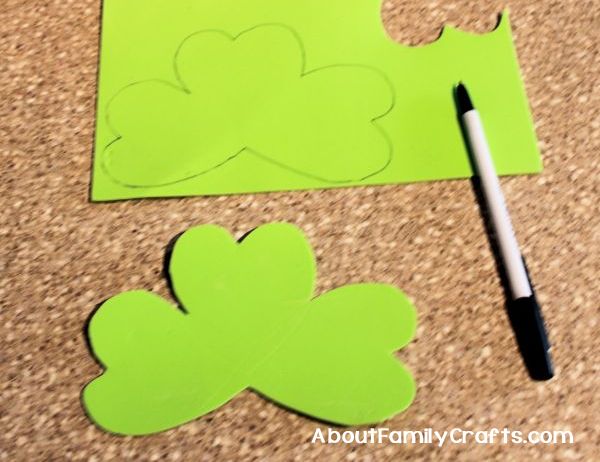
Carefully cut out your shamrock. Place it on top of the craft foam and trace around it to make a second shamrock. Cut the second shamrock out. Set these both aside for the time being.
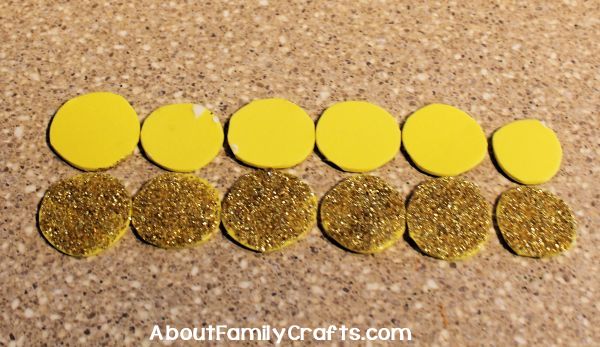
Grab the yellow craft foam and cut out coins. If you want them all to be a uniform shape, simply trace around a bottle cap or something similar. I wasn’t too worried about making mine all the same so I simply cut out 12 circles. Honestly, they were all close enough to the same size that they worked fine.

Next, we need to make the shamrock and coins a little more exciting! Of course, you can simply buy craft foam that is already glitter-covered, but I love any excuse to pull out my Mod Podge.
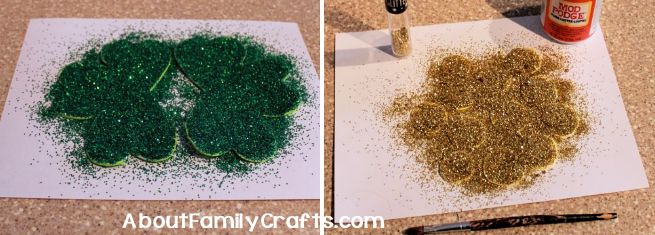
Set a piece of plain paper down on your work surface. Set your craft foam shamrock shapes on the paper. Use a paint brush and spread a generous amount of Mod Podge all over them.
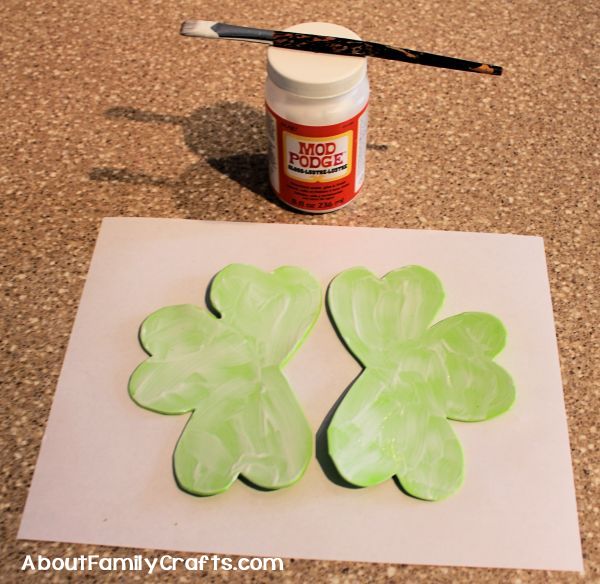
Now, sprinkle a generous amount of green glitter all over the shamrocks. Make sure all of the Mod Podge is covered. Set this aside and let it dry.
Repeat these steps to cover the coins with gold glitter. Set these aside to dry.
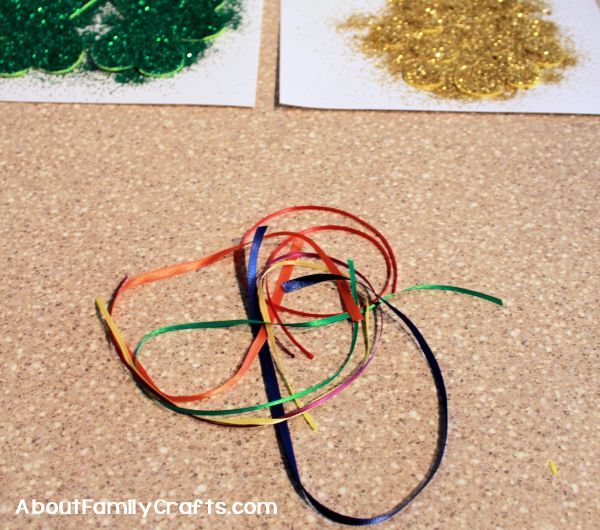
While you are waiting for the Mod Podge to dry, you can cut your pieces of ribbon. The pieces I cut were all around 16- to 18-inches long. They were not all the same length, but you can certainly cut them all the same length if you like. Now, set these aside for the time being.
Once the Mod Podge is dry, carefully shake off each shamrock and each coin to remove any loose glitter. you should be able to pour the extra glitter from the paper back into the glitter bottles.
Set the shamrocks and glitter-covered coins back onto the pieces of paper and brush a generous coating of Mod Podge over the glitter. This will seal the glitter in place so you don’t end up with most of it all over your house once the kids starts playing with the wand. Let the Mod Podge dry completely.

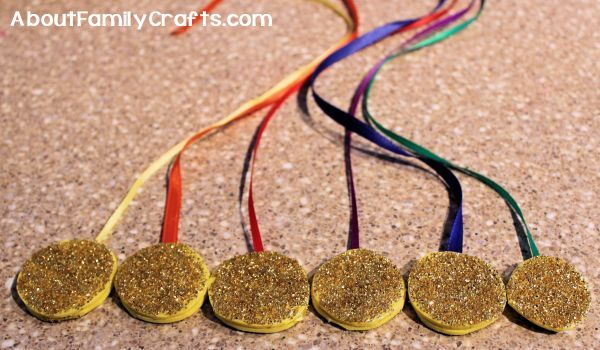
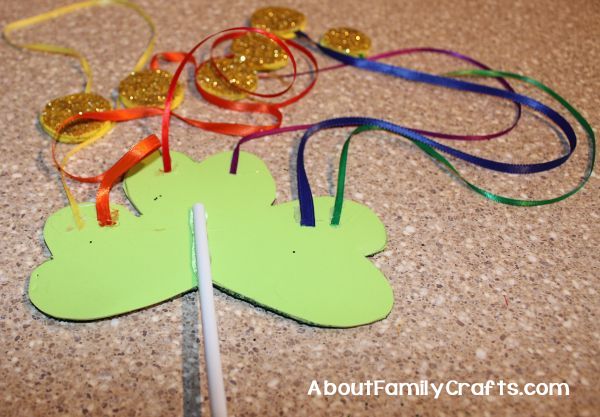
We can start assembling the St. Patrick’s Day wand once all of the Mod Podge dries. To assemble, we need to start with the coins. I laid mine coins out on the table like this…
I then glued one end of each piece of ribbon to the coin that was upside down. I then used hot glue to attach the second coin to the first.
The other ends of each ribbon can now be glued to the back, top side of one of the shamrock pieces. I spaced mine out, but you can glue all of yours to the top heart if you prefer.
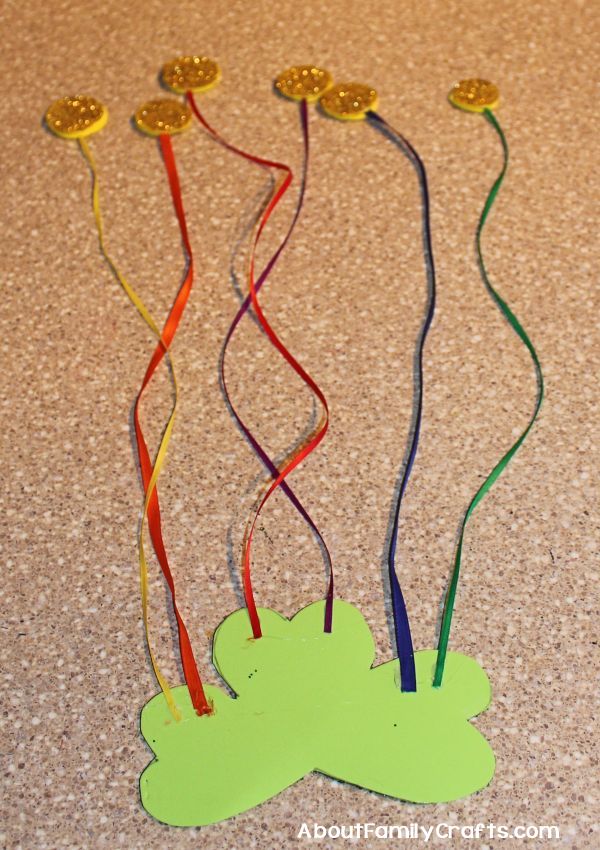
The dowel, skewer, or stick now needs to be glued onto the wand. I used a generous amount of hot glue on the top 2-inches of the dowel and then pressed it onto the foam.
Finally, we need to glue the other shamrock to the first one. I first glued the center down and then worked my way out, adding a little bit of hot glue at a time.

What do you think of this fun wand? Can you think of any kids who might like one? Or how about a fun game that can be played with it?