Maybe I am strange, but one of the things I like to do when it is time for the Olympics is look at all of the Olympic pins (called badges by some). Every Olympics brings with them new usually dozens of pin designs to collect.
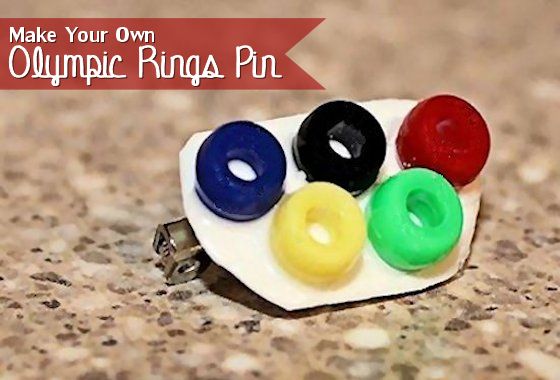
Because of this pin tradition, I thought it would be fitting for families to have a pin they can make in honor of their own homemade Olympics. This is a simple pin that looks like the Olympic rings, but you can personalize however you like.
Supplies Needed to Make an Olympic Rings Pin:
- Craft Foam
- Pony Beads
- Pin Back
- Craft Glue
- Permanent Marker (optional)
Tools Needed:
- Scissors
It is easier to work with a smaller piece of craft foam so start off by cutting a square that is about 2-inches big. I thought white craft foam was the best option to showcase the colorful beads, but you can certainly use any color you like. Glue the pony beads in the correct order (use the photo as a guide if you need to) in the center of the craft foam. Make sure you use a generous amount of glue. If you want to write something on your pin, make sure you leave enough room above or below the beads.
Let the glue dry completely. This may take awhile on the craft foam. While you are waiting for the glue to dry, you can write on your pin using the permanent marker if you desire. You can simply write the year, you can write a short inspirational message, your name, or anything else you like. Make sure any writing dries along with glue. If you are concerned about the marker ink drying properly on the craft foam, you can use acrylic paint to write your message.
Once the glue, and any writing is dry, use a pair of scissors to trim around the beads/writing. Glue the pin back to the back side of your pin and let it dry. Make sure you use enough glue so when you push the pin back into it, the glue comes up around it a little bit.
When the glue is completely dry, you can now wear your Olympics ring pin! Will you wear it while you watch the games or will your family make up their own games?


