Awhile back I posted on Facebook and asked everyone what sort of paper mache projects I should make and I got a handful of responses. One of the first suggestions was about making a turtle, so that is how the idea for this paper mache turtle came about.
Use these directions to make your own turtle or use the techniques shared here to create your own paper mache masterpiece.
Supplies Needed:
- Balloon
- Cardboard
- Toilet Paper Rolls
- Masking Tape
- Newspaper
- Paper Mache Paste (find link below)
- Green Spray Paint
- Paper
- Green Fabric Scraps
- Mod Podge
- Large Google Eyes
- Craft Glue or Hot Glue Sticks
Tools Needed:
- Pen or Pencil
- Scissors
- Foam Brush
- Hot Glue Gun (Optional)
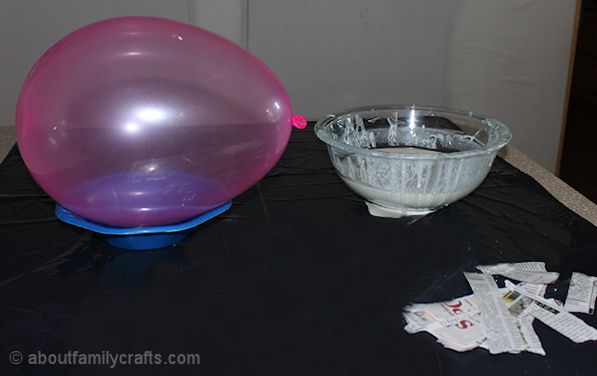
Before you start, cover your work surface. Paper mache can get very messy! I used a large garbage bag but you can use newspaper, wax paper, an old shower curtain, or anything else you have handy.
Tear several strips from the newspaper (use the regular newsprint paper, not the shiny ads). You want the strips to be an inch or less wide and about four to six inches long. They do not need to be the same size.
Blow up the balloon. To hold the balloon still while you are gluing on the newspaper strips, use a bowl. If you use a plastic bowl, you may want to cover the bowl with plastic wrap to make sure it doesn’t stick.
The last thing you need to do before you can start your paper mache turtle is to mix up a batch of paper mache paste. All you need for this is some flour, water, and a bit of salt. You can follow the directions here: How to Make Paper Mache Paste.
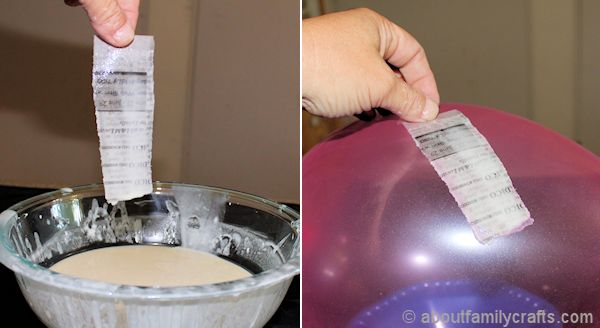
Now you are ready to begin. Set the balloon on the bowl. Dip a piece of newspaper into the paper mache paste. Lift the newspaper out of the paste and pull it between your thumb and forefinger to squeeze off any extra glue. Place the newspaper strip onto the balloon.
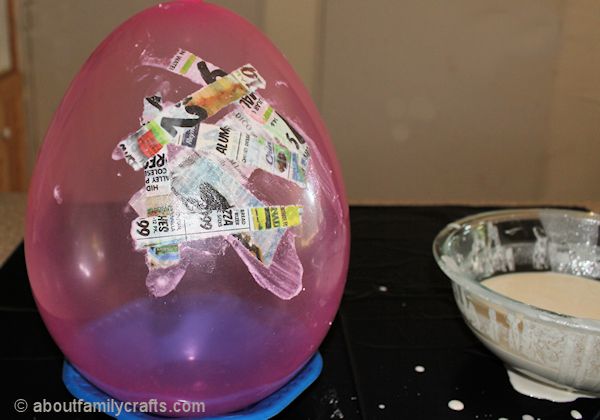
Grab a second strip of newspaper and dip it in the glue in the same manner and put it on the balloon. Continue in this fashion, making sure the newspaper strips go in different directions and even cross over each other.
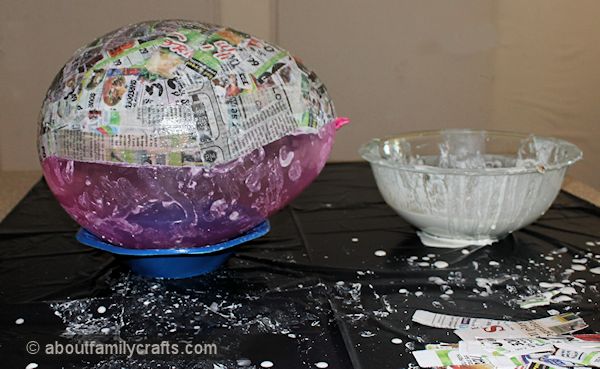
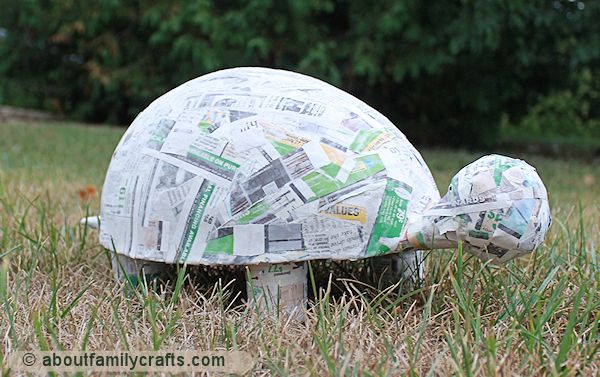
To make this paper mache turtle, you will want to cover half of the balloon with newspaper strips. Get one layer on and then let it dry for about 24 hours or until it is dry (this might take longer if you are in a humid climate). Once the first layer is dry, add another one over it. Let that layer dry and then add one more. You will want a total of 3 layers.
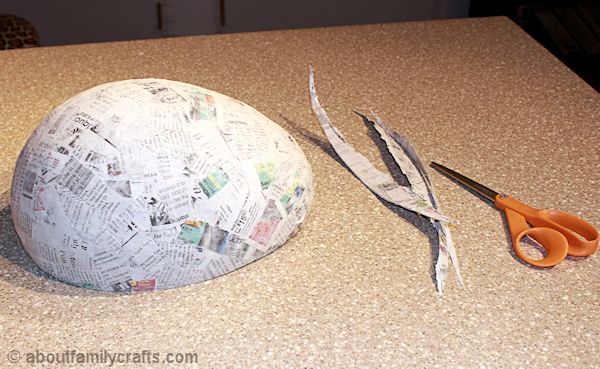
Once the paper mache is dry, flip your balloon over on your work surface and pop the balloon. Use a pair of scissors to trim the ends of the paper mache so the edges sit flat on your table. Your turtle’s shell is now ready!
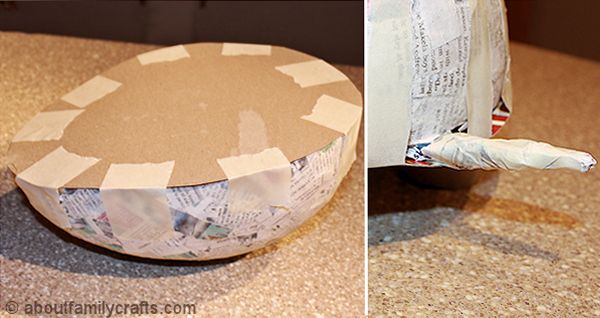
Lay the shell onto a piece of cardboard and trace around it. Cut out the cardboard oval. Use masking tape to attach it to the paper mache shell. Cut two cardboard tubes in half. Use masking tape to attach these to the bottom of the turtle to be the legs.
The turtle’s tail is made using a small piece of newspaper. Roll it so it looks like a worm and then wrap it will masking tape. Push one of the ends in between the turtle shell and the cardboard opposite the head. Tape it in place.
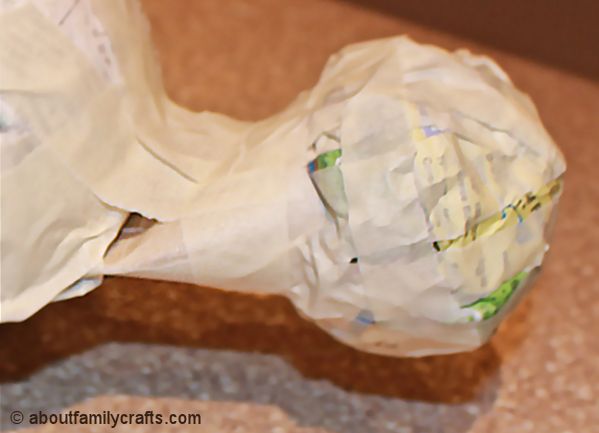
To make the turtle’s head, make a ball out of a couple piece of newspaper. Wrap it with masking tape to help it hold its shape. Tape this ball to the end of a toilet paper roll. Pinch the other end of the toilet paper roll together and slide it in between the balloon shell and the piece of cardboard. Use more masking tape to hole that in place.
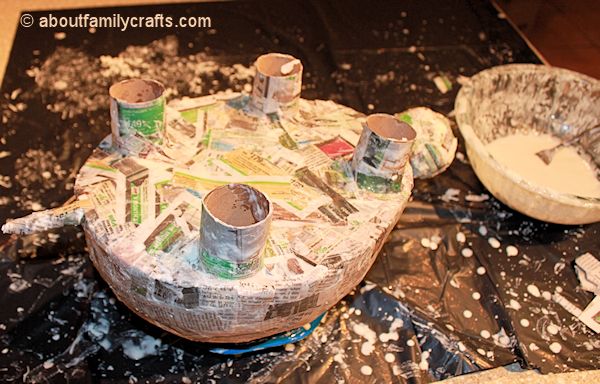
Now you can start the paper mache process again. This time, you will want to cover the heads, legs, tail, and belly of the turtle. Make sure you also use the paper mache to attach the shell to the cardboard and cover all of the masking tape. Add three total layers of paper mache, making sure to let each layer dry completely. (Did you notice the condition of the work surface? I wasn’t kidding about the mess!)
Your paper mache turtle is now ready to be painted! Bring it outside (or to a well-ventilated area) and use green spray paint to completely paint the turtle. Let the paint dry.
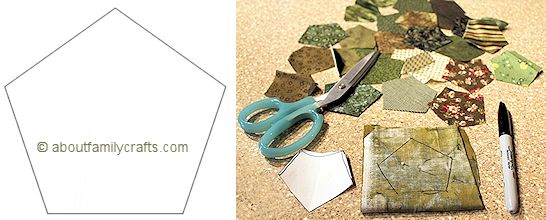
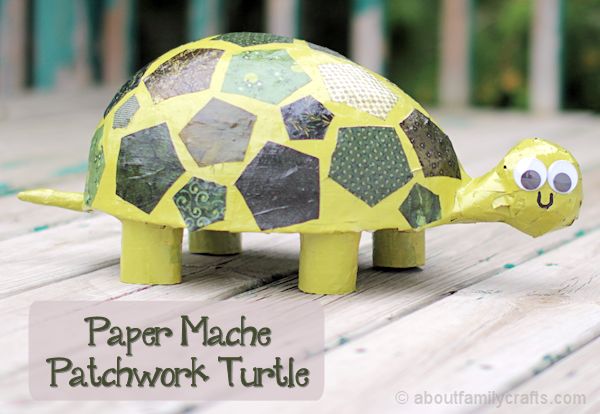
Cut a pentagon shape from a piece of paper. You will want it to be between 2 and 3 inches tall. Use this as a pattern to cut several pieces of green fabric. I used 30 pentagons cut from 15 different green fabrics. They do not all have to be the same size and the cuts do not have to be perfectly straight.
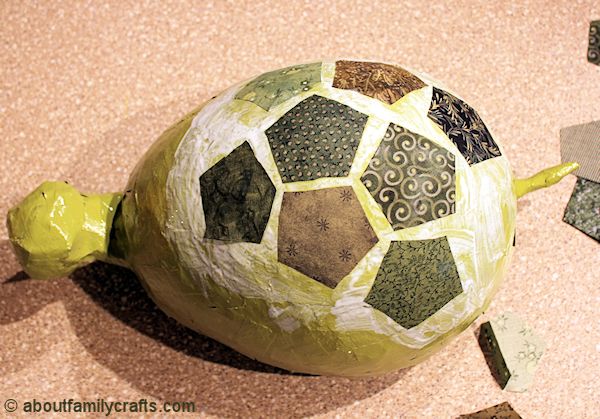
Working in a small area at a time, use the foam brush to spread the Mod Podge onto the turtle’s shell. Press the fabric pentagons onto the Mod Podge, smoothing down all of the edges. Continue this until the entire shell is covered. I did end up making some of the pentagons smaller to fill in some of the gaps.
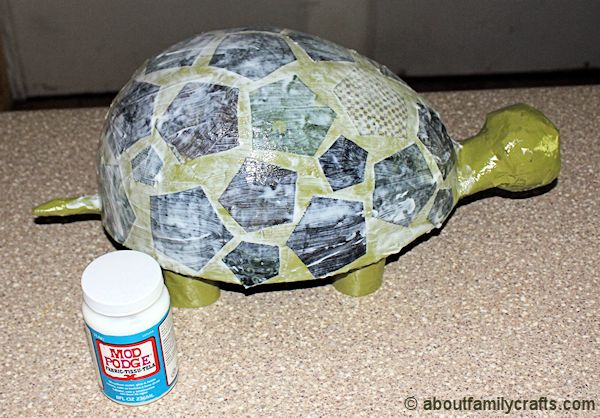
Once all of the fabric pieces are in place, go over all of the pieces with the Mod Podge to seal them. Let the turtle set until dry. You might want to follow up with another coat of Mod Podge to make sure you everything is nice and smooth.
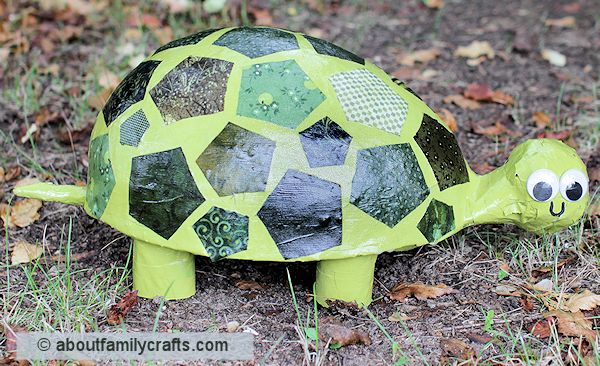
Now all that is left is to give your turtle some eyes and a mouth. I used large google eyes, held in place using hot glue. For the mouth, I simple painted on a black smile. How will you display your finished turtle?


20 comments for “Paper Mache Patchwork Turtle”